Perhaps you'd like every department in your company to have a different colour border around their photo, or maybe a stripe on the bottom to identify levels of contractors, security clearance, or visitors at a quick glance. Conditions are a useful tool that will allow this to happen without having to make multiple templates.
In this example I am going to show you how to add condition to a square. However, these instruction will apply to anything you would like to add a condition to.
Go to Templates and then navigate to the template you would like to add the conditions.
Select the object or image on your template that you would like to add a condition to (In this example we are adding it to the black square shown below.) This will pull up the Object Settings screen.

3. Select the conditions tab. This will pull up the Conditions settings.
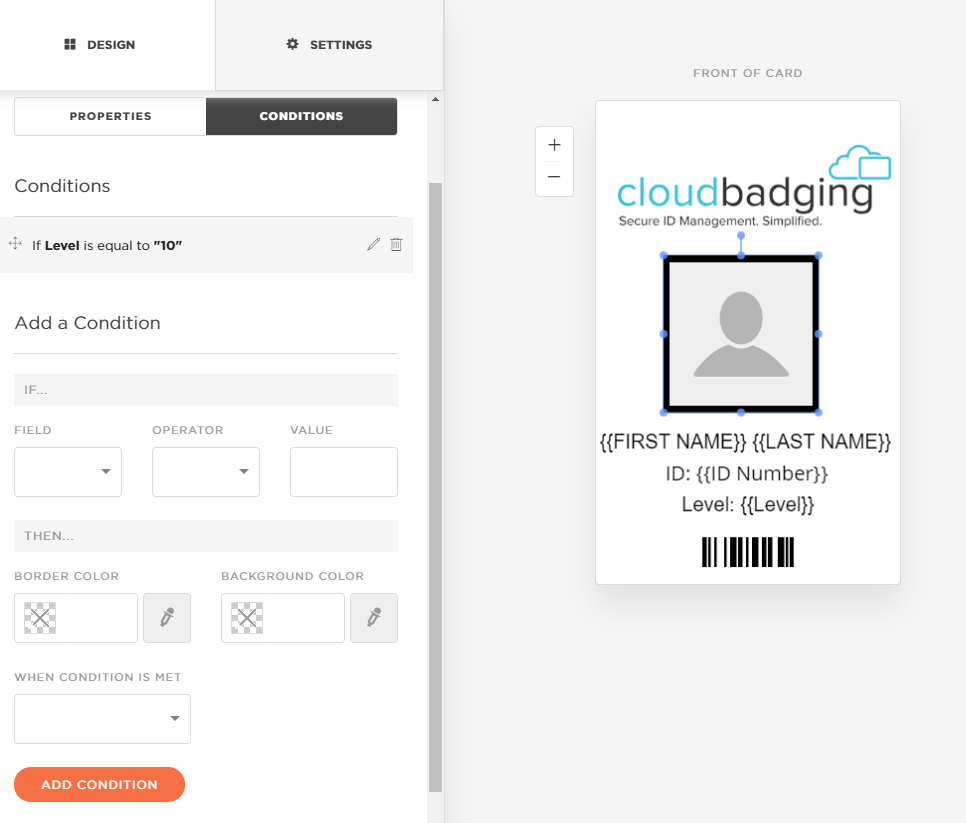
4. As you can see in the picture above I have this condition set to "If Level is equal to "10". This means that the the black square shown in the photo will change colours for any record with a level of 10.
First you will select the field you want the condition to apply to. (This is just a field from your dataset.)

Then you will select the operator. You have the option of "equal to" or "not equal". In this example I want the level to be equal to the value. That way the box will only change colours when it matches the value added. (If you select "not equal" the colour of the box will change for every level except the value you added.)

Next type in the value. In this example I am going to type in a number since I am using Level as my field. If you are using a different field, for example: Department, you would type in the department you wanted to add the condition to.
Then choose the background colour that you want the condition to change the box to.
After that you will need to choose when the condition would be met. Here you have 3 options; Apply changes, Show object and apply changes, Hide object. In this example I will select Apply changes because I want the objects to only change colours. The other two options are used more frequently for images you either want to show up on your card or disappear from your card depending on the condition.

Once finished, you will select the orange Add Condition button to apply it to your card.
5. Select the orange preview button and you will be able to see your cards changing based upon the condition you have added.
Was this article helpful?
That’s Great!
Thank you for your feedback
Sorry! We couldn't be helpful
Thank you for your feedback
Feedback sent
We appreciate your effort and will try to fix the article